introduction
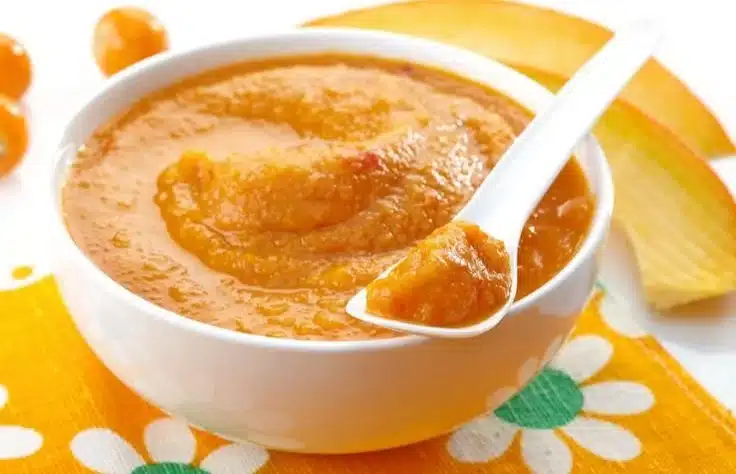
Stage 1 Easy Homemade Baby Food Puree Recipes (4-6 Months) are simple, gentle, and perfect for introducing your little one to single-ingredient flavors. This guide walks you through safe cooking, smooth textures, and smart storage so your baby gets nutrient-rich purees without fuss. For an easy primer on gentle steaming, try this approachable gentle steaming methods that help preserve color and nutrients.
Why You’ll Love This Stage 1 Easy Homemade Baby Food Puree Recipes (4-6 Months)
- Mild, single-ingredient flavors ideal for first tastes and allergy spotting.
- Fast to make: most purees are ready in 10–25 minutes.
- Freezer-friendly: batch cook and freeze in portions for busy days.
- Budget-friendly and family-friendly — same simple steps scale up.
Ingredients Needed
Vegetables (single-ingredient purees)
- 1 large carrot, peeled and chopped (about 1 cup)
- 1 small sweet potato, peeled and diced (about 1 cup)
- 1 small butternut squash, peeled and cubed (about 1 cup)
Fruits (single-ingredient purees)
- 1 apple, peeled, cored, and chopped (about 1 cup)
- 1 ripe pear, peeled and chopped (about 1 cup)
- 1 small ripe banana (mashed, no cooking required)
Basics & liquids
- 1–4 tablespoons breast milk, formula, or water (to thin as needed)
- A pinch of cinnamon (optional; wait until baby has tolerated single foods)
Tools
- Small saucepan or steamer basket
- Blender, food mill, or immersion blender
- Ice cube tray or small silicone molds for freezing
Step-by-Step Instructions
- Wash, peel, and chop the produce into even pieces for even cooking.
- Steam or simmer vegetables/fruits until very tender (10–25 minutes depending on the item).
- Transfer cooked pieces to a blender or use an immersion blender; add 1 tbsp liquid and puree until silky.
- Adjust texture: add more breast milk, formula, or water 1 tsp at a time to reach a smooth, runny puree.
- Cool to room temperature before serving; test temperature on your wrist.
- Portion into small containers or ice cube trays and label with date.
- Refrigerate up to 48 hours or freeze for up to 3 months.
- Thaw in fridge overnight or warm gently in a water bath; stir and test temperature before feeding.
Serving Suggestions Stage 1 Easy Homemade Baby Food Puree Recipes (4-6 Months)
- Serve 1–2 teaspoons initially, working up to 1–4 tablespoons as baby accepts textures.
- Spoon-feed or place a few drops on a silicone feeder for self-feeding practice.
- Combine purees only after each single ingredient has been tolerated for several days.
For tips on safe cooling and storage to make meal prep easier, see this helpful quick cooling and storage guide.
Tips for Success Stage 1 Easy Homemade Baby Food Puree Recipes (4-6 Months)
- Start single-ingredient: introduce one new food every 3–5 days to watch for reactions.
- Texture counts: aim for thin, runny purees at first, gradually thickening as baby shows readiness.
- Save cooking liquid: reserve a bit of the steaming water to thin purees and keep nutrients.
- Batch and freeze: freeze in 1-ounce cubes for perfectly portioned servings.
- Reheat gently: avoid microwaving in very small containers; warm sealed containers in a water bath.
For additional timing and safety considerations for homemade baby foods, review this concise timing and texture tips.
variation (if any)
- Combo stage (after tolerance): mix cooked apple + cinnamon or sweet potato + pear.
- No-cook option: ripe banana or avocado mashed smooth with breast milk or formula for instant stage-1 feeds.
- Thicker puree (later stage): reduce liquid and mash to a lumpier texture as baby advances.

FAQs
Q: When can I start Stage 1 purees?
A: Most babies are ready between 4–6 months when they can hold their head up, sit with support, and show interest in food. Check with your pediatrician if you’re unsure.
Q: How long can homemade purees be refrigerated?
A: Store fresh purees in the fridge for up to 48 hours in a sealed container. Freeze up to 3 months.
Q: Can I add salt or sugar to baby purees?
A: No. Avoid added salt, sugar, honey (until after 12 months), and strong spices. Use mild herbs or a pinch of cinnamon only after tolerance is established.
Q: How do I thaw and reheat frozen puree safely?
A: Thaw in the refrigerator overnight or warm sealed containers in a warm water bath. Stir, test temperature, and never refreeze thawed baby food.
Q: What if my baby gags on the texture?
A: Gagging can be normal while learning to eat. Offer thinner purees and smaller spoons. If gagging persists or you’re concerned, contact your pediatrician or feeding specialist.
Ingredients
Vegetables (Single-Ingredient Purees)
- 1 large carrot, peeled and chopped About 1 cup
- 1 small sweet potato, peeled and diced About 1 cup
- 1 small butternut squash, peeled and cubed About 1 cup
Fruits (Single-Ingredient Purees)
- 1 medium apple, peeled, cored, and chopped About 1 cup
- 1 ripe pear, peeled and chopped About 1 cup
- 1 small ripe banana, mashed No cooking required
Basics & Liquids
- 1-4 tablespoons breast milk, formula, or water To thin as needed
- 1 pinch cinnamon Optional; wait until baby has tolerated single foods
Instructions
Preparation
- Wash, peel, and chop the produce into even pieces for even cooking.
- Steam or simmer vegetables/fruits until very tender (10–25 minutes depending on the item).
- Transfer cooked pieces to a blender or use an immersion blender; add 1 tablespoon of liquid and puree until silky.
- Adjust texture: add more breast milk, formula, or water 1 teaspoon at a time to reach a smooth, runny puree.
- Cool to room temperature before serving; test temperature on your wrist.
- Portion into small containers or ice cube trays and label with date.
- Refrigerate up to 48 hours or freeze for up to 3 months.
- Thaw in the fridge overnight or warm gently in a water bath; stir and test temperature before feeding.